Создание и запуск Minecraft сервера с модами на Fabric
Это подробный гайд, инструкция по созданию и запуску Minecraft сервера с модами для Fabric который можно запустить из под Windows (и Linux). В статье я шаг за шагом покажу как создать сервер, базовые настройки, дам советы относительно установки модов.
Установка необходимой версии Java:
Сервер игры использует JDK (Java Development Kit), джава для разработчиков, и вы должны установить правильную версию среды на ваш пк. Перед загрузкой рекомендую узнать, 32bit ваша операционная система или 64bit, если на данном этапе вы уже не понимаете о чем речь, не умеете гуглить и не знаете ответа, то дальше будет только сложнее.
- Для Майнкрафт 1.14-1.16.5 требуется JDK 8 — скачать можно здесь
- Для Майнкрафт 1.17: требуется — JDK 16 — скачать можно здесь
- Для Майнкрафт 1.18 и более новых версий: требуется — JDK 17 — скачать можно здесь
Скачали, установили, рекомендую сразу запомнить адреса расположения исполнительного файла Java, они нам понадобятся:
В случае JDK 8 установленной по ссылке выше это C:\Program Files\OpenJDK\jdk-8.0.262.10-hotspot\bin\java.exe
В случае JDK 16 установленной по ссылке выше это C:\Program Files\Java\jdk-16.0.2\bin\java.exe
Предварительная загрузка файлов сервера:
Для установки Fabric сервера для любого Minecraft нам понадобится официальный установщик Fabric, он же устанавливает и сервер, нужно скачать exe или jar версию.
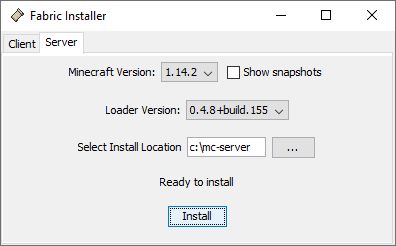
Запустите скачанный файл, выберите вкладку «Сервер», выберите нужную версию Minecraft и папку в которой будет ваш будущий сервер.
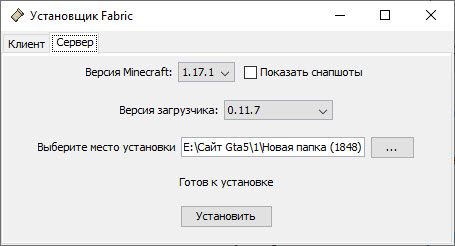
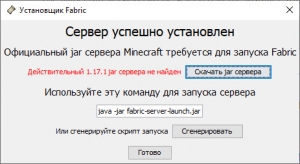
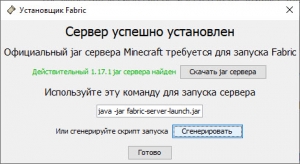
На следующем этапе вы увидите предупреждение, что не найден файл официального Minecraft сервера, нажмите кнопку скачать Jar сервера, так же чуть ниже кнопку Сгенерировать для создания .bat файла запуска.
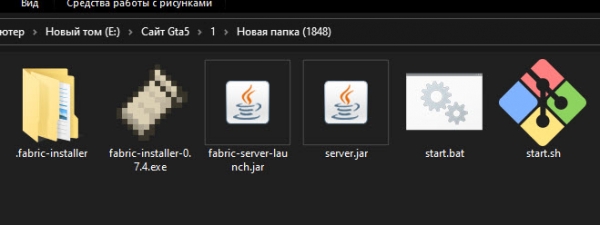
Настройка .bat файла запуска
Итак, я надеюсь вы установили JDK на первом шаге и запомнили адреса до исполнительного файла Java.exe, сейчас они нам понадобятся. Напомню, что Fabric сервер у майнкрафт 1.14-1.16.5 работает на JDK 8, а у 1.17 JDK 16, 1.18 и 1.19 на JDK 17, а более новые версии могут требовать и более новые версии Java.
Кликните ПКМ по start.bat и измените его (либо можете открыть любым текстовым редактором),
замените java на «C:\Program Files\OpenJDK\jdk-8.0.262.10-hotspot\bin\java.exe» или «C:\Program Files\Java\jdk-16.0.2\bin\java.exe» (с кавычками) в зависимости от версии майнкрафт.
Так же добавьте параметр -Xmx2048M где 2048 это максимальное количество оперативной памяти доступной для сервера, не забудьте кавычки, не допускайте лишних символов, пробелов либо их отсутствия, сохраните файл.

Первый запуск сервера.
Запустите файл start.bat, вы увидите черное окно консоли, а в папке сервера появятся новые файлы и папки. Можете закрыть окно сервера, он пока все равно не запустился.
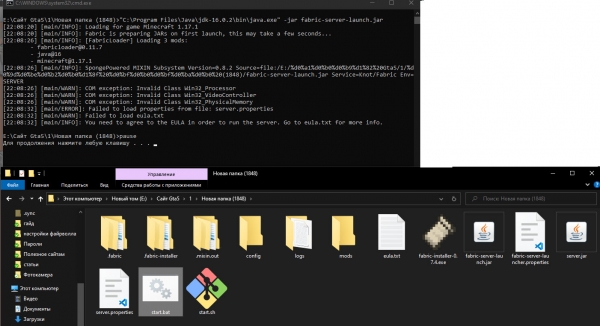
Откройте появившийся файл eula.txt, замените в нем eula=false на eula=true, это кстати говоря подтверждение что вы согласны с EULA использования сервера, т.е лицензионное соглашение, сохраните.
Базовая настройка сервера:
- Если у вас пиратка, то измените online-mode=true на online-mode=false, иначе к серверу смогут подключаться только лицензионный игроки.
- Заполните значение server-ip= это IP вашего сервера, он может быть внешним IP интернета, локальным IP вашего пк внутри домашней сети, либо IP вашего компьютера в сети Хамачи.
Все прочие параметры server.properties не являются обязательными, но в этом файле вы сможете указать название сервера, разрешить полет, включить нужный режим игры, запретить нижний мир или край, запретить спавн монстров, указать принудительный ресурспак, указать ники для белого списка и многое другое.
Повторный запуск сервера
Установка и удаление модов:
Fabric моды устанавливаются аналогично обычному майнкрафту, вы помещаете мод и все дополнительные необходимые моды в папку mods выключенного сервера, но есть несколько важных правил описанных ниже. У модов на сервере так же есть папка с конфигами, где можно их настроить. Удаление модов из папки Mods удалит мод с сервера, в отличии от forge сервера на данный момент сервер не требует подтверждения удаления с карты предметов и блоков удаленного мода, он их удаляет сам, будьте аккуратны.
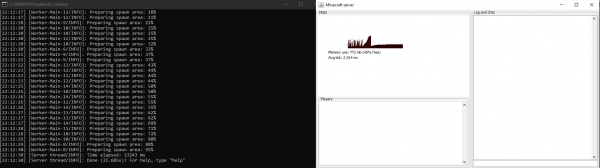
Если все прошло успешно и вы подключились к серверу, поздравляю вас, ниже на скриншоте видно папки mods клиента и сервера, 2 окна сервера и окно игры с модом.
Установка сервера Minecraft/Fabric
Прежде, чем настраивать сервер Minecraft вместе с Fabric, возможно, вы хотите скачать протестировать все моды в MultiMc, и только когда вы убедились, что нареканий нет, приступать к настройке сервера. Как это сделать, вы можете узнать тут: Установки Fabric с помощью MultiMC
ШАГ 2: Проверка установки Java
Сервер Minecraft для работы требует Java Runtime Environment. Чтобы проверить, установлена ли Java, откройте окно Выполнить , используя комбинацию клавиш Windows+R . Введите cmd в поле для текста и нажмите OK . Это действие откроет командную строку.
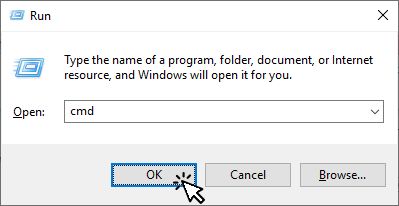
Введите команду java -version и на Enter

Проверьте, похожа ли версия Java на что-то подобное:
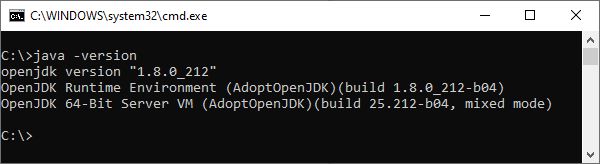
Вы можете пропустить ШАГ 3 если вы не хотите обновлять установленную версию Java.
Однако, если Java не установлена, результат команды будет подобным такому:
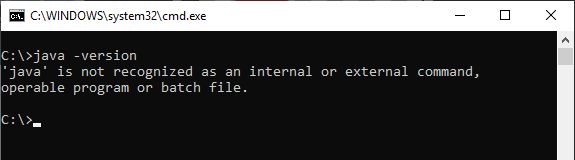
ШАГ 3: По усмотрению: Установка Java
Если в ШАГЕ 2 вы поняли, что на вашем компьютере Java не установлена, вам нужно её установить.
Также если версия установленной Java как минимум 8 , вы можете пропустить этот шаг.
Чтобы загрузить установщик Java, перейдите сюда
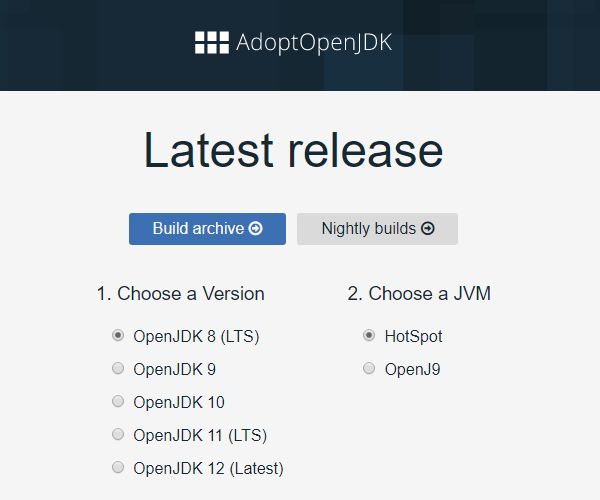
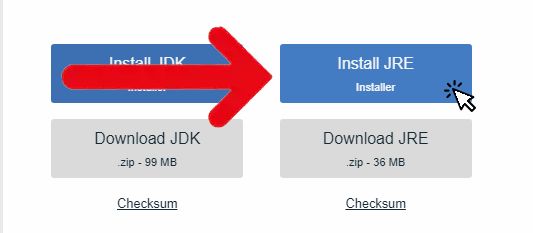
Выберите версию Java 8 (JRE), скачайте установщик для своей операционной системы и следуйте его инструкциям.
ШАГ 4: Установка Fabric в папку сервера
Перейдите на https://fabricmc.net/use/ , и выберите пункт “Server”, затем скачайте установщик для Windows (exe) или универсальный (jar).
Запустите скачанный установщик Fabric в виде jar/exe файла. Выберите вкладку Server . Выберите Minecraft Version и Loader Version .
В поле Select Install Location введите путь папки, в которую хотите выполнить установку. Если заданной вами папки не существует, установщик создаст её.
Процесс установки может занять некоторое время, однако, когда он закончится, вы увидите что-то подобное:
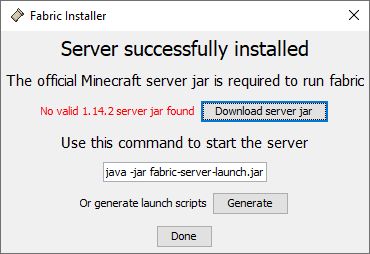
Нажмите на Download server jar чтобы скачать оригинальный jar-файл сервера Minecraft
Нажмите на Generate , чтобы сгенерировать start.bat или start.sh Эти файлы вы можете использовать для запуска сервера.
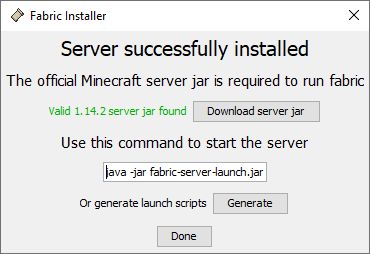
Теперь вы можете закрыть установщик Fabric.
В командной строке, которую вы открыли в ШАГЕ 2 напишите:
Подсказка: Если папка находится в другом системном томе, сначала переключитесь на него, только потом переходите в нужную папку. Чтобы переключиться на другой топ, введите в командной строке:
Поле ввода команды в командной строке должно измениться на следующее:
Теперь напишите следующее, чтобы создать файл eula.txt :
echo eula=true>eula.txt [ENTER]
ШАГ 5: Запуск сервера
ЗАМЕТКА: Теперь у установщика есть кнопка, создающая запускной файл сервера, поэтому эта инструкция слегка устаревшая.
ЗАМЕТКА: Если вы обновляете Fabric, удалите папку .fabric в корневой папке сервера. Если вы обновляете версию Minecraft, не забудьте скачать подходящий server.jar , как — объяснено выше.
Запустите сервер с помощью команды в командной строке:
java -jar fabric-server-launch.jar nogui [ENTER]
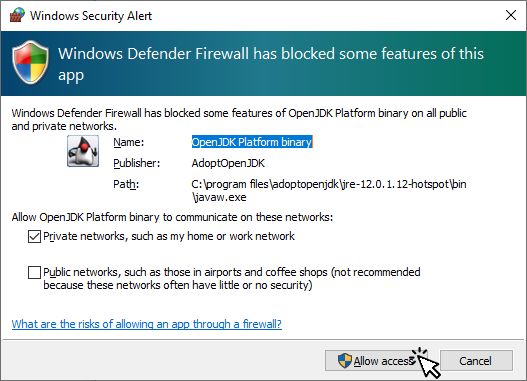
Если вы используете Windows, и получили в ответ ошибку безопасности Windows, нажмите на Разрешить доступ
В командной строке вы должны увидеть что-то подобное:
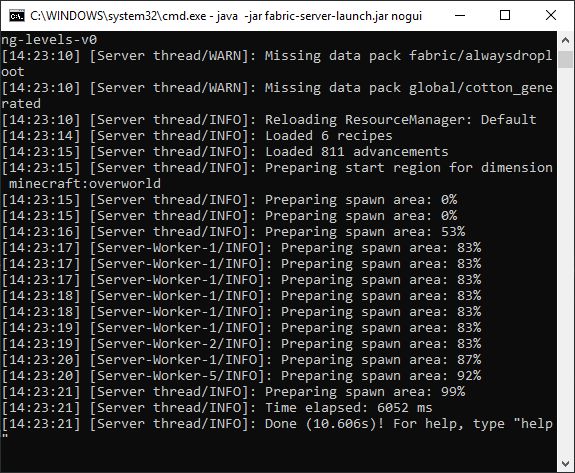
Теперь, когда сервер запущен и готов к работе, вы можете его остановить и создать/отредактировать файл запуска. Напишите
в командной строке, чтобы остановить сервер. Затем напишите следующее:
echo java -jar fabric-server-launch.jar nogui>start.bat [ENTER]
Если вы хотите указать, сколько ОЗУ будет выделяться серверу, напишите сделующее вместо предыдущего:
echo java -Xms1024m -Xmx2048m -jar fabric-server-launch.jar nogui>start.bat [ENTER]
Используйте нужны значения после Xms и Xmx
Теперь напишите следующее:
echo pause»start.cmd [ENTER] (that's two “>”, not “»”)
Эта команда создаст файл c:\mc-server\start.bat , который будет запускать сервер, если его открыть.
Теперь вы можете установить моды путём добавления их в папку c:\mc-server\mods . Самый простой способ это сделать — скопировать их из профиля MultiMC, который вы создали, чтобы протестировать работоспособность модов.
Вы также можете ознакомиться со списком модов в интерфейсе Mod Menu. Любой мод, отмеченный как CLIENT, вы можете удалить из папки с сервером.
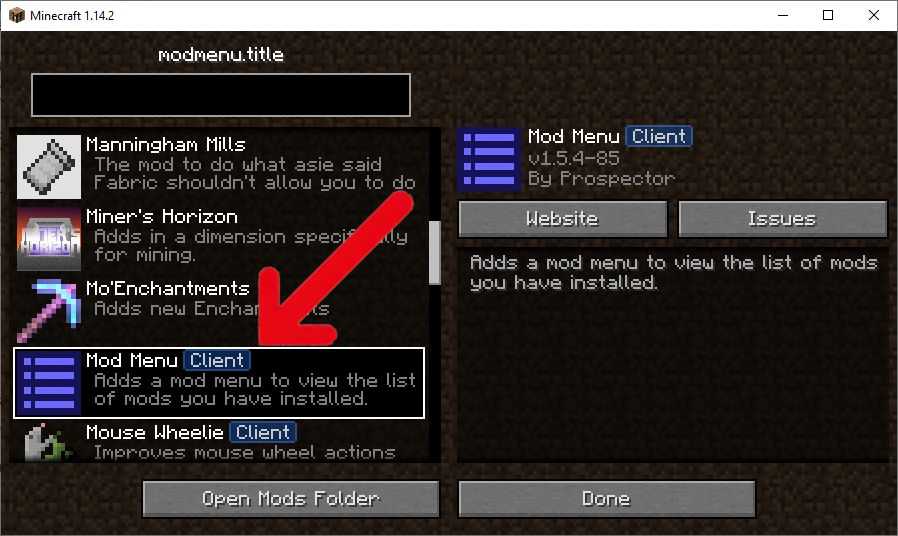
Если вы используете Optifine внутри профиля multimc, не копируйте файлы optifine и optifabric jar в папку модов сервера.
После того, как вы скопировали все необходимые моды, вы, возможно, захотите скопировать конфигурационные файлы из профиля MultiMC, которые располагаются в папке config .
Теперь вы можете запустить сервер с помощью файла start.bat .
ПРИМЕЧАНИЯ
Некоторые моды, отмеченные как CLIENT могут вызывать ошибки, если использовать их на сервере. Если вы не можете понять, какой мод вызывает ошибку, вы можете попробовать удалять их один за одним до того момента, пока не поймёте какой это мод. Если вы столкнулись с проблемой, пожалуйста, сообщите об ошибке на странице мода.
Если вы собираетесь использовать выделенный сервер, и его владелец позволяет вам запускать сервер, используя только server.jar ,
Переименуйте server.jar В vanilla.jar
Переименуйте fabric-server-launch.jar в server.jar
Отредактируйте конфигурационный файл fabric-server-launcher.properties : serverJar=vanilla.jar
В большинстве случаев это поможет. Если вы понимаете, что не можете использовать Fabric service на выделенном сервере, попросите провайдера добавить поддержку Fabric.
AI-nsley69 / installation.md
If you have read the entirety of this guide or you’re confused about any part, feel free to ask in my discord server. Please check the troubleshooting & faq section before asking. Your issue or question might’ve already been covered here. I try my best to keep this guide up to date, but I do forget about it at times and I could also miss anything in the guide when updating it to a new version. Please do your own research (for mods in particular) and try using newer versions of the mods/software available if it breaks!
This is a small list to explain the linux commands being used in this guide.
cd — This allows us to change our working directory (also known as ./ ) into another directory, by default, you will be in your home directory ( /home/user/ also known as
). If you wish to go to a parent directory (the directory which your current directory is in), then you can simply use .. as the destination.
mkdir — This lets us create a directory, we use this to make one for housing our minecraft related files and we’ll be relying on cd to get into it. This is all for making it cleaner instead of having all of your files in one place.
curl — This is a tool to transfer data from a server, we use it to grab files such as the fabric installer and fabric mods.
sudo — This stands for superuser do. It is used to execute commands as root (basically administrator) in this guide.
dnf — This is what handles the packages on Oracle Linux, we use it to install various programs we’ll utilize in this guide.
nano — A terminal text editor to edit files.
screen — A screen manager, this will manage a session for us that would otherwise not exist when we disconnect from ssh, therefore not having the Minecraft server stay up 24/7
man — This command is not used in the guide, but I highly recommend learning it, as you can read manual pages from commands with it, always look at this if you’re stuck first! (Example usage: man cd ).
firewall-cmd — Firewall running on the server (yes, you have a software firewall managed by the vm and another one managed by Oracle Cloud, both will need to be configured.), we can use this to open ports for the firewall to let through.
In this guide, we will download various software (with the Oracle Linux OS provided by Oracle Cloud). Screen is used to handle a session to keep the server running, zip is a dependency for sdkman, sdkman is a package manager for SDK (software development kit) which (in my opinion) makes it easy to install jre (java runtime environment). You will also need a method to ssh into the machine, make sure you know how to use ssh keys (public and private) to connect to the machine with whatever software you’re running. It is more safe than using a password!
If you’re on Linux, I simply recommend using the terminal emulator of your choice to ssh and transfer files with, or transfer files with your file manager if you’re more comfortable with that.
For Windows users, I recommend using PuTTy to access the terminal through ssh, if you wish to transfer files, I recommend WinSCP. With WinSCP, You’ll most likely get dropped into the root directory, but you can simply just go to the home directory and then the one with the name of your user.
Signup to claim the always free tier
I’m not going to explain this step, it should be straightforward.
Make your Always Free ARM Core VM
Begin by navigating to «Create a VM instance»
Give the instance a name of your choice, such as minecraft-server
Scroll down to Image and Shape and Change the Shape to VM.Standard.A1.Flex . For maximum performance, please change the shape to 4 cores instead of 1, however you should be fine to run it on 2 cores instead, it is up to your liking and how you wish to spend your resources. I also highly recommend you stick with Oracle Linux as that seems to be performing best on their hardware.
Afterwards, double check that the Always Free Eligible label persists next to the name.
Next up is making sure that it has a virtual cloud network with ipv4 address assigned and a subnet. You could create this with the setup shown in the image.
Next up, you will need some sort of ssh access, choose one of the options for ssh and handle it how you feel is best suited, you will need some sort of method to ssh into the machine in the end. After this, leave the boot volume defaults and create your virtual machine.
Open port 25565
This is vital for anyone to be able to connect to your virtual machine, you will need to open port 25565 as UDP and TDP, to do this navigate to the control panel of your virtual machine and press on the subnet. Don’t forget to write down your ip from the machine, this is to connect through it via ssh and minecraft later on.
Press on the default security list to change firewall rules.
Press the button to add an ingress rule
Add an ingress rules, only one for Ip Protocol TDP (UDP is unneccesary) with this configuration:
- Source Type = CIDR
- Source CIDR = 0.0.0.0/0
- Destination Port Range = 25565 Example image below
Now, ssh into your virtual machine and run these 3 commands to open them on the firewall on the machine:
If you’re not sure how to ssh into your machine, try ssh opc@ip.to.your.vm
Install fabric and java
We are going to install Java through dnf, if you plan on running a server before 1.16 (especially forge) you will need to use java 8. Any other server software will work with java 17 all the way back to 1.7.2
If you wish to install java 11 or 8 instead, that is doable by replacing the 17 with those 2 numbers. Other versions are not available through the official repository (the source from which dnf uses to install software).
Next up, we create a directory and download fabric.
If you wish to create a minecraft server on the latest version of Minecraft, simply run this command below
However, if you wish to specify your minecraft version you need to pass the -mcversion flag and specify the version after it, i.e for 1.16.5 you would add -mcversion 1.16.5 . Please do note that different versions need different java (1.17 needs java 16 and anove, whereas 1.18 needs java 17 and above. Most cases you can use java 17 for older versions too, but it doesn’t go as well for older versions like 1.7) to the end of the command above. To get all availabe flags you can set, run java -jar fabric-installer.jar help
Run your Minecraft server.
For running the minecraft server, we will use a systemd service. Which allows it to run in the background of the server and not depend on your session (the thing you’re connecting to, as running it normally would be connected to it) to be active.
Controlling the server after this will be quite simple:
First of all, we need to accept the eula, this can be done easily with the command below, however, I recommend making yourself familiar with the EULA before agreeing to it.
If you wish to skip the explanation for how to setup the systemd service file, simply run the following commands
TODO: Write an explanation of the systemd service file and how to configure it
And you’re done! Now you should be able to connect to your Minecraft server by entering the ip. If you have any questions or issues, feel free to ask in my discord server.
DO NOT USE THIS! It breaks with the systemd service file due to SELinux!
I personally prefer installing Java through sdkman, which is a package manager for Software Development Kits (SDK) such as Java. I will also be using screen to handle the session for the minecraft server and curl to download mods from github. First up, install screen and zip through yum (which is our package manager on Oracle Linux), zip is needed for sdkman.
If screen can’t be found, run the following (or use tmux ):
When that has finished installing, we can download sdkman
Now we can run a command to check all available java installations with
My personal go to is zulu, preferrably latest version. To install a java version, simply run
At the time of writing this, the latest available zulu build has the identifier 17.0.1-zulu . To install that version, simply replace the <Identifier> part with it.
Run your Minecraft server.
THIS METHOD IS NOT RECOMMENDED. PLEASE REFER TO THE NEWER ONE!
The most basic command would be
If you wish to change the memory used by the server, change the 2G in both -Xmx and -Xms . Please change memory according to your needs, but do so safely. You do not need to allocate a lot for a small server. I rarely recommend modifying jvm args unless you know what you are doing, in that case I doubt the majority of this guide is useful to you in the first place. I recommend putting this into a file named start.sh :
The final step is to use the chmod command to make the file executable, like so:
Your server should be almost done now. It’s a matter of launching it and installing any mods you need. We now need to start a screen session called «minecraft». This is so we have a session that is not managed by your computer, else the server would instantly die once you terminate the session.
To exit this session, use the following keybind ctrl + A + D . The good part about a session is that the Minecraft server will not stop due to us closing down our ssh session or exiting it. You can rejoin the session later (in a new ssh session i.e) by running screen -r minecraft .
If you need to kill a screen session, you can see the available screens with screen -ls . It will be displayed in the format of pid.name where process id (pid for short) is an integer. We can kill the screen session with kill (pid of your screen session) . This will forcefully shutdown the server with no autosave, thread careful with it. If you’re curious to more things you can do with screen, you can run man screen to get the manual for it. However, knowing that the -S flag is to create a new session, attach to it and that -r will reattach to a session ( -R will try to reattach, but create a new one if it’s not found, not recommended) and how to kill a screen session is enough for basic usage.
Now that you’ve created the session, while inside of it, you can start your Minecraft server with
When launching your minecraft server, you will need to agree on EULA. Simply run it through your favourite text editor (nano is preinstalled).
and change eula=false to eula=true . Now press ctrl + x and when you’re prompted about saving it press y and then enter. Afterwards, start your minecraft server again and it should be working.
How much memory should I allocate?
Please refer to Jellysquid’s gist. It is written for people asking this question regarding client-side, but it translates quite well for servers. I wouldn’t allocate more than you need, but I also wouldn’t allocate less than needed. For example, a server with half a dozen of players would run very well on 2-4gb, even for more modded fabric environments. Ultimately, test it yourself and tune to your own situation, I find 2-4gb for the capacity this server could have to be decent.
Change the following settings in server.properties
Sync chunk writes has been personally causing issues when loading/unloading chunks, turning it off solved it for me. Broadcast console to ops can affect ops on the server with bad internet, as it’s taking up more bandwidth
Installing mods (1.18.1)
This here will install lithium and carpet for you, you could either use curl -LO https://website.com/download/link with the direct download link (doesn’t work with curseforge from my experience) or upload through WinSCP.
If you wish to install more mods, you could begin by looking into this section of alkyaly’s list of performance mods. I highly recommend you look into these mods before install them on anything you care about, however, the author has done a decent job of marking potentially dangerous mods that are not yet quite ready.
Start minecraft on reboot
This is assuming your launch script is in /home/$USER/minecraft and that you have crontab installed. We will also start it in a screen session called minecraft .
First step is to open up crontab
Now we simply just add this in there (press a for insert mode if vim) and save it (esc :wq enter to save)
After this, your server should be launching everytime the machine reboots!
Install a ramdisk ( ⚠️ A bit risky! ⚠️ )
A ramdisk is a disk that runs entirely in your ram, I do recommend this if you wish to have very smooth loading, however there are a few disadvantages such as corruption if your ramdisk runs out of space or data loss/corruption on a sudden shutdown of the system. However, if you wish to proceed, do so at your own risk. Bare in mind, this will create a 8gb big tmpfs, I do recommend running this if you have 8gb of memory to spare for the server.
Add tmpfs /home/opc/minecraft/world tmpfs defaults,size=8000m 0 0 to /etc/fstab with
Now we need to copy over our world folder
This will copy the world directory to one called world_storage, which will be the place where we store the world on a harddrive incase the computer dies or anything. Next step is to add a few things to crontab
This will open crontab for us, simply press a to start insertion mode
Paste this in and press esc + : + w + q and press enter. This will tell it to write and quit the editor. Now we need to sync the world everytime we close the server
After this, start the session for the server again and start up your server, chunkloading shoud now be smooth!
Simply change your script to this:
If you have configured anything else, or added more commands to your script, simply put those between the java and echo command. The sleep command is just to easily exit the server between restart (i.e if you wish to stop it for a while etc, you can simply do it while the Restarting server.. text is occuring without any issues).
Setup a free DNS
This is mainly to have a cleaner address and reduce the hassle of sending ips all the time. If you cannot afford an ip, fear not! I have a solution, you can use noip to get a subdomain on some of there domains, however, you will need to refresh it once a month, but it’s free. Alternatively, you can use duckdns, great service that I have personally used before and loved it.
Graalvm is a vm that is meant for high optimization, combined with graal jit compiler you may see a performance improvement. However, I have personally seen a much greater warmup time with graalvm and graal jit compiler compared to something like adoptopenjdk, but after 20-30 minutes that has stabilized and the idle mspt is lower.
To install graalvm, you follow the similar process for what we did before, but using a graalvm build (like 21.3.0.r17-grl ). Then, to enable the jit compiler, add these jvm arguments to your startup command:
As I said though, this might improve performance, this is only if you find this interesting or wish for a small edge in performance, but make proper tests and check whatever works best for you in your situation!
My instances was shutdown, whys that?
Do not fear, after your free trial, your instance will need to be remade. I had some issue like:
However, you simply just need to terminate the instance, make sure to not delete the attached boot volume, then simply browse to your boot volumes, select the detached one and remake your instance from that boot volume (you will not need to put in ssh keys again, but will need to change shape). Other than that, it should be back to normal once you start it up and connect to it etc.
Как установить фабрик на сервер?
В статье я шаг за шагом покажу как создать сервер, базовые настройки, дам советы относительно установки модов. Предупреждение: Если вы хотите .
Как установить Fabric сервер?
Перейдите на https://fabricmc.net/use/ , и выберите пункт “Server”, затем скачайте установщик для Windows (exe) или универсальный (jar). Запустите скачанный установщик Fabric в виде jar/exe файла. Выберите вкладку Server . Выберите Minecraft Version и Loader Version .
Как установить фабрик?
Обычная установкаСоздайте новый профиль игры.Выберите пункт “Edit Instance” в контекстном меню или в правой части окна.На вкладке “Version” окна конфигурации нажмите кнопку “Install Fabric”, чтобы открыть диалоговое окно со всеми доступными версиями загрузчика Fabric. . Нажмите кнопку ОК.Feb 11, 2022
Как установить Forge на сервер?
Если Вам нужно загрузить ядро «Forge».Остановите сервер.ВАЖНО! . Скачиваем forge с офф. . Устанавливаем скачанный файл .exe, выбираем Install server и любой удобный путь установки.Находим установленные файлы.Чтобы подключиться к FTP серверу, в панели управления нажмите на кнопку «Данные для подключения к ФТП».
Как проверить моды в Майнкрафт?
Заходим на сайт, справа кликаем на вкладку с модификациями или текстур-паками. Далее выбираем свою версию Minecraft. Узнать, в какую вы играете, можно, посмотрев в нижний левый угол в меню игры. Если ищете моды на какую-то конкретную тематику, выбирайте и её — на сайте есть соответствующие разделы.
Что лучше Fabric и Forge?
Fabric более оптимизирован, обновления выходят чаще. У Forge более обширная библиотека модов, может работать на более старых версиях игры. Для последних версий определенно лучше использовать Fabric.
Как установить ядро Фордж?
Установка ядра трудностей не вызывает:Скачайте ядро Mohist нужной версии с официального сайта.Загрузите его на свой хостинг или поместить в пустую папку на компьютере.Запустите ядро. . Поместите ваши моды в папку mods, а плагины – в plugins.Готово, вы великолепны!
Как заменить ядро на сервере Майнкрафт?
Возвращаемся в панель управления на страницу сервера и нажимаем на кнопку «Редактор командной строки». Далее выбираем нужную версию Java и жмем «Применить», новые версии работают с Java8. Из списка выбираем загруженное ядро. Применяем.