КАК СДЕЛАТЬ АРТ МАЙНКРАФТ В CINEMA 4D
Бесплатно скачать последнюю версию Minecraft можно по ссылке:


Как сделать [3D]Арт в [Cinema 4D!?]
Как сделать МАЙНКРАФТ АРТ в Cinema 4D
КАК СДЕЛАТЬ ТОПОВЫЙ АРТ В СТИЛЕ МАЙНКРАФТ В CINEMA 4D
КАК СДЕЛАТЬ ПРЕВЬЮ В СТИЛЕ АИДА И ДЕМАСТЕРА?! ПРИВАТНЫЙ РИГ АИДА, ПОЛНЫЙ СЛИВ! ТУТОРИАЛ 2019!
���� КАК СДЕЛАТЬ АРТ + ПОЗИНГ В СТИЛЕ ВИГА?! ТУТОРИАЛ 2019! ����
Туториал по Аватарке — Как СДЕЛАТЬ АВАТАРКУ как У ТОПОВ?! Как Обработать арт — Как Сделать Арт/Позу��
КАК СДЕЛАТЬ 3Д АРТ С ВЫДАВЛИВАНИЕМ + ОБРАБОТКА?! ТУТОРИАЛ 2018!
КАК СДЕЛАТЬ АРТ АНИШ + ПОЗУ?! НОВЫЙ ТУТОРИАЛ!
КАК СДЕЛАТЬ КРАСИВЫЙ 3Д АРТ КАК У ТОПОВ?!
КАК СДЕЛАТЬ АРТ МАЙНКРАФТ С ВЫДАВЛИВАНИЕМ КАК У ТОПОВ?! // 98% НЕ НАШЛИ ЭТОТ РИГ.
Как сделать Майнкрафт арт в программе Cinema 4D?
Инструкция о том как сделать Майнкрафт арт в программе Cinema 4D.Очень полезно для тех кто еще не знает как сделать красивый Майнкрафт арт для Youtube.В видео активно используется техника выдавливания.
Оригинальное название Minecraft анимации — Туториалы от DreamZ Как сделать майнкрафт арт?
- Автор DreamZ
- Запостил
 Администратор
- Просмотров 780
- Дата публикации 2018 Дек. 09
Другие риги
Blue Fire Blurr.
- 2023.07.12
- 75
- 0
Monster meme sh.
- 2023.06.30
- 85
- 0
СЕРВЕР Майнкраф.
- 2023.06.26
- 248
- 0
Это меня раздра.
- 2023.06.24
- 122
- 0
Meet the Engine.
- 2023.06.23
- 137
- 0
ну и пожалуйста
- 2023.06.21
- 123
- 0
Комментарии
- Добавить свой ролик
Mine-imator — программа для создания видео и графики в стиле Minecraft.
Как в cinema 4d сделать арт майнкрафт в cinema 4d
Ищите, смотрите, скачивайте видео — все это бесплатно и на большой скорости. Вы даже можете найти фильмы и скачать их. Результаты поиска можно сортировать, что упрощает поиск нужного видео.
Скачать бесплатно можно фильмы, клипы, эпизоды, трейлеры, при этом вам не нужно посещать сам сайт Youtube.
Скачивайте и смотрите океан бесконечного видео в хорошем качестве. Все бесплатно и без регистрации!
Видео Как сделать МАЙНКРАФТ АРТ в Cinema 4D от автора Канал Vandam’a ツ.
Игровой видеоролик «Как сделать МАЙНКРАФТ АРТ в Cinema 4D» можно скачать бесплатно в форматах mp4, x-flv, 3gpp, для этого нажмите кнопку «Скачать видео» которая находится сверху.
Кроме того, вы можете посетить канал автора «Канал Vandam’a ツ», который можно найти на нашем бесплатном видео сайте и посмотреть похожие видеоролики про данную игру.
Видео для мобильного телефона, смартфона, планшета и т. д. можно посмотреть тут онлайн, бесплатно и без регистрации. А также скачать мобильное видео в формате mp4, x-flv и 3gpp!
Пожалуйста, оставьте свой комментарий или отзыв к этому видеоролику! Автору будет очень интересно узнать, что вы думаете о его работе.
КАК СДЕЛАТЬ КРАСИВЫЙ 3Д АРТ КАК У ТОПОВ
КАК СДЕЛАТЬ 3Д АРТ С ВЫДАВЛИВАНИЕМ ОБРАБОТКА ТУТОРИАЛ 2018
КАК СДЕЛАТЬ КРАСИВЫЙ 3Д АРТ МАЙНКРАФТ КАК У ТОПОВ ТУТОРИАЛ 2018 1 Cinema 4D
КАК СДЕЛАТЬ 3Д АРТ С ВЫДАВЛИВАНИЕМ КАК У ТОПОВ
КАК СДЕЛАТЬ АРТ МАЙНКРАФТ С ВЫДАВЛИВАНИЕМ КАК У ТОПОВ 98 НЕ НАШЛИ ЭТОТ РИГ
Как сделать майнкрафт арт в Cinema 4D 2018
КАК СДЕЛАТЬ 3D АРТ ЗА 10 МИНУТ TUTORIAL 4 CINEMA4D
КАК СДЕЛАТЬ ШАПКУ МАЙНКРАФТ КАК СДЕЛАТЬ АРТ ТУТОРИАЛ Cinema 4D Photoshop CS6
Как сделать 3D Арт в Cinema 4D
Как сделать майнкрафт персонажа в анише Anishwij в Cinema 4d
Как сделать самый простой майнкрафт арт в CINEMA 4D
ТУТОР по арту МАЙНКРАФТ КАК СДЕЛАТЬ АРТ
КАК СДЕЛАТЬ КРУТОЙ АРТ MINECRAFT РИГ СИНА
Как сделать майнкрафт персонажа в анише Anishwij в Cinema 4d
Как сделать МАЙНКРАФТ АРТ в Cinema 4D
КАК СДЕЛАТЬ ТОПОВЫЙ АРТ КАК У ТОПОВ В CINEMA 4D В 2019
КАК СДЕЛАТЬ АРТ АНИШ ПОЗУ НОВЫЙ ТУТОРИАЛ
Как сделать персонажа в анише Anishwij V9 Туториал Риг Anishwij V9
ТУТОРИАЛ КАК СДЕЛАТЬ АНИШ арт И ОБРАБОТАТЬ НОВЫЕ ФИШКИ Аниш Арт для МАЙНКРАФТА В СТИЛЕ РОМЫ ГЕРОЕВА
Новый туториал по персонажу RmrPremium Cinema4d
ТОПОВЫЙ МАЙНКРАФТ РИГ ДЛЯ ДИЗАЙНА SCMR 4 1 RIG FREE CINEMA 4D
КАК СДЕЛАТЬ АВАТАРКУ МАЙНКРАФТ ТУТОРИАЛ Cinema 4D Photoshop CS6
КАК КРАСИВО ОБРАБОТАТЬ АРТ МАЙНКРАФТ ОБРАБОТКА В ФОТОШОПЕ ЗАРУБЕЖНЫХ ЮТУБЕРОВ
КАК СДЕЛАТЬ 3D АРТ В CINEMA 4D ТУТОРИАЛ
Как сделать 3D арт без Cinema 4D
КАК СДЕЛАТЬ 3Д АРТ КАК У ТОПОВ ТУТОРИАЛ 2018 1 Cinema 4D
КАК СДЕЛАТЬ АРТ В CINEMA 4D В СТИЛЕ МАЙНКРАФТ
КАК СДЕЛАТЬ 3D АРТ В CINEMA 4D МАЙНКРАФТ
КАК СДЕЛАТЬ КРАСИВОГО ПЕРСОНАЖА ANISH
КАК СДЕЛАТЬ КРУТУЮ 3D ПОЗУ Minecraft Cinema 4d R14 Новый ТУТОР 10 лайков
КАК СДЕЛАТЬ МАЙНКРАФТ АРТ ВАЙВЭД FMR5
ТУТОРИАЛ КАК СДЕЛАТЬ АРТ АНИШ ПОЗУ
Туториал Как сделать 3D Minecraft АРТ в Cinema 4D
Minecraft Render Cinema 4D Speed Art Render 4
Туториал Как сделать 3D арт В Cinema 4d
Как сделать 3D Арт майнкрафт на Cinema 4d
КАК СДЕЛАТЬ АРТ С ВЫДАВЛИВАНИЕМ КАК У ТОПОВ CINEMA 4D
КАК ИМПОРТИРОВАТЬ МИР ИЗ МАЙНКРАФТА В CINEMA 4D Туториал
КАК СДЕЛАТЬ ART С ВЫДАВЛИВАНИЕМ В CINEMA 4D ТУТОРИАЛ
ТУТОРИАЛ ПО RMR PREMIUM
КАК СДЕЛАТЬ 3D АРТ С КРУТЫМИ ВОЛОСАМИ И ВЫДАВЛИВАНИЕМ НА АНДРОИД
КАК СДЕЛАТЬ АВАТАРКУ АРТ MINECRAFT БЕЗ ПРОГРАММ
КАК СДЕЛАТЬ МАЙНКРАФТ 3Д АРТ ТУТОРИАЛ 2018 Cinema 4D
Как сделать арт в Cinema4D
ТУТОРИАЛ КАК СДЕЛАТЬ 3D АРТ В CINEMA 4D
КАК СДЕЛАТЬ 3D АРТ КАК У РОМЫ ГЕРОЕВА ЛЁШИ НИКОЛАЕВА В CINEMA 4D В 2018
ТУТОРИАЛ КАК СДЕЛАТЬ АРТ С ФОНОМ В CINEMA 4D
как сделать арт MineCraft как у топов Cinema 4D
Как сделать предмет из Minecraft в Cinema 4D Туториал
КАК СДЕЛАТЬ 3Д АРТ МАЙНКРАФТ БЕЗ ПРОГРАММ 2019
Как Сделать Майнкрафт Арт В Cinema 4D 2018
Мк Магнолия Из Бисера Цветы Из Бисера Своими Руками
Gitem Gitem Live
Party Extended Mix
Sathi Jebe Die Dhoka Odia New Sad Song Pradeep Kumar Studio Version Hd
Рамазон Хайит Байрами Узбекистонда O Zbekistonda Hayit Bayrami Sanasi
كرمي منت آبه أتوحشناك سابك تنشي ابريل 2018
Vlog Pamela Safitri Pisang Dimasukin Ke Balon
Ray Hamidov Someone
Аёллар Учун Мосламалар Ayollar Uchun Moslamalar O Zbek Tilida
Hitman Absolution Rosewood Orphanage Purist Suit Only No Ko Shadow
Sevdiyim Insan Gitara
Breaking Point 2018 Official Trailer Hd
Poradnik Html 1
Lady Gaga Is That Alright Dj Tony Pecino Bachata Remix
Aao Mere Paas Aur Aao Rare Kishore Hit
Luxury Lifestyle Of Mike Tyson 2018
Mannar Mathai Speaking Paalsaranikalil Song
Top Instrumental Despacito Ringtone Download Link In Description
Miraculous Ladybug New Superhero Crystal Swan Miraculous Ladybug Speededit Season 2 Fan Character
How To Make Beautiful Minecraft Renders In Cinema 4D
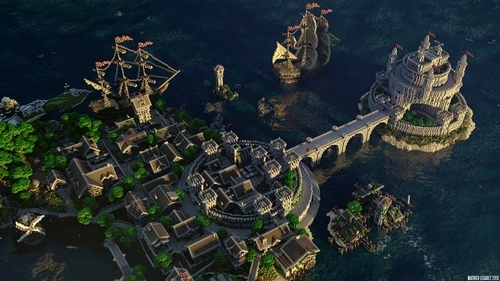
A tutorial on how to create beautiful and photorealistic renders of your Minecraft worlds in Cinema 4D. The following tutorial is a demonstration of the core steps I go through to make renders. I obviously add and modify things from one render to the other, but these steps are always the same.
Are you a proud Minecraft server owner? Do you have dozens of amazing builds in your world that deserve nice renders? There are many ways to create beautiful photorealistic Minecraft renders in a short amount of time. Let me show you how I do it!
A step-by-step tutorial
The following tutorial is a demonstration of the core steps I go through to make renders. I obviously add and modify things from one render to the other, but these steps are always the same.
If something is not clear, please let me know and I will help you. It is my first tutorial and I would appreciate feedback in order to improve it, so every server owner can make beautiful renders. Thank you!
In this tutorial, I use Cinema 4D as it offers in-depth lighting and rendering options, however, the software does cost money. Alternatively, you can try Chunky, which is a free Minecraft renderer, but I won’t get into that in this tutorial. You can also use any other 3D modelling package such as Autodesk Maya, 3D Studio Max, or Blender, to follow along this tutorial but the layout may be different.

1. Converting world to 3d object
There are many different software you can use to convert Minecraft worlds to .OBJ models, such as Mineways, jMc2Obj, mcobj. You can also click here to see the full list. I use Mineways because the others are all command line programs, whereas Mineways has a user interface and is easier to use.

Mineways is great for its intuitive layout and ease of use. Download Mineways, and place the extracted folder on your desktop. Once Mineways is opened, load your world and use the right-mouse-button to highlight the desired area to export. Note that under “File”, there is an option to set a terrain file, which is the Minecraft resource pack to use when exporting. There are already a few resource packs that come with Mineways (the PNGs in the Mineways root folder) but there is a way to add your own.
To add your own resource pack, first locate it. It may be in the .minecraft folder, or in your downloads if you just downloaded it. Once located, open/extract the resource pack and find the “blocks” folder ([resource-pack]\assets\minecraft\textures\blocks\). Copy its content to the “blocks” folder inside your Mineways folder. Now simply run “TileMaker.exe” or “TileMaker32.exe” (32bit). It should generate a PNG terrain file called “terrainExt.png”. Rename that PNG or it will get overwritten if you generate a new resource pack. You can now load that terrain PNG in Mineways in “File > Set Terrain File”. My favorite is the Ovos Redemption pack for my renders.
Now we are ready to export! Go to file, Export for Rendering, and change the settings as you want, however the defaults are usually what I use. Mineways will export an .OBJ file (your world), three .PNGs (textures) and an .MTL file which links your textures to your world. Put them all in a folder.
Note: Mineways may crash if the selected export region is too big. If you want to export huge parts of your world, consider another software. However, you can also export your world region by region, and uncheck the “center model” when exporting with Mineways. This will let you easily put all the pieces back together in Cinema 4D.
2. Cinema 4D / 3D software
Once we have our .OBJ model and textures, we’ll need a 3D modelling package in order to render it. I use Cinema 4D as personal preference, but Blender is a great free alternative with tons of tutorials and resources.
Inside your 3D software of choice, import the .OBJ file that was exported using one of the converting tools.
In Cinema 4D, click the “File” menu on the right, then “Merge Object”, and select the .OBJ file of your exported world.

If the texture link is broken, everything will be black like this.

In order to fix the problem, we must manually select all the material files on the bottom left corner, and change their texture link by clicking on “<<multiple values="">>” on the right.</multiple>

A window will open. Select the world-RGBA.png texture exported with your .OBJ world. That is the sprite sheet of your world’s textures.

Now that the textures are linked and our world has become colourful, we must add the transparency to materials for blocks such as water and leaves.
Once again, select all the textures, and on the bottom right panel, click on the “Basic” tab. There will be a list of options to check from. Tick the “Alpha” channel.
An “Alpha” tab will appear. Go in the Alpha tab and link the texture to the world-ALPHA.png like in the previous step.

*If you use another software, you may have to manually add the textures too. In that case, dig around and try to link the color/diffuse channel and the alpha channel to the RGBA png.
Realistic Water
We can replace the water with a more realistic looking water. If you used Mineways, all the block types will have their own layer, so find the “Stationary_Water” object layer in the right panel.
We can either create a new water material and apply it on the “Stationary_Water” to override the default blue water, or delete the water object completely to add our own. I usually delete the water layer completely.

Then, I use Infinite Ocean by C4Depot which creates very realistic water with waves, foam, and reflections. However, it increases render time significantly, and the plugin costs money.
A free and fast solution is to use the built in water presets that come with Cinema 4D. They can be found in “Create > Load Material Preset” menu just over the textures at the bottom of the screen.
Lighting
Next we want to add nice lighting. The best way to do that is to experiment within your 3D software, but inside Cinema 4D, you can try adding a Physical Sky which usually gives you a nice starting point. Physical Sky gives you a multitude of options letting you set the time, sun intensity, color, haze, etc, however you can stick with the defaults which is a nice warm sunrise.

You can also add an “Environment” object which adds more haze and atmospheric fog. This is great when you want to hide the horizon, or the cut off region of your world.
Render Settings
Then, for the render settings. If using Cinema 4D, click CTRL-B to open up the render settings window, and add Ambient Occlusion and Global Illumination from the “effect” button on the left.
Ambient occlusion darkens the little cracks and corners, and Global Illumination simulates the bouncing of lights on all the surfaces to make more accurate lighting. These two features will greatly improve the quality of your final result and make it more realistic. They can be found in almost all 3D softwares as well so look around in the render settings for similar options.
Once again, in Cinema 4D, the default settings will usually be enough for our purpose, but feel free to experiment.

One last important thing to change; Anti-Aliasing. This will smooth jagged edges on curved lines and diagonals, and will make your digital image much more realistic. Head over to the Anti-Aliasing tab in the render settings, and change the settings to “Best“.
If you are feeling adventurous, you can add a camera with depth of field, as well as sky textures and clouds, but I usually like to keep it simple.
Now find a good angle. It’s important that the limits of the world are not visible in the final render. Move the camera around until the horizon is hidden and then render.
Note: If you want to add your own sky image in post processing, go in Cinema 4D’s render settings. In the “Save” tab, check “Alpha Channel” and change the image format to “PNG”. This will render the image with a transparent sky to let you add your own later.
3. Post Processing
If the “Physical Sky” was used in Cinema 4D, then the render will probably have a warm feel. I like to cool it a bit and saturate the sky/water. I try to keep the picture as realistic as possible, with subtle color correction. I find that exaggerated color grading, lens flares and tilt-shifts are too much. We want to focus on the build, not your Photoshop skills. However, it is up to you to create the image you want so have fun!

If this tutorial helped you, please comment below and post your own renders! I would love to see them.